There’s something undeniably magical about pulling a perfectly golden, chewy pizza straight from your own oven-a creation that marries crisp crust with bubbling, melty toppings in a symphony of flavor. But beneath that mouthwatering masterpiece lies the true hero: the dough. Mastering homemade pizza dough is more than just a recipe; its an art adn a science combined, a hands-on experience that transforms humble ingredients into a canvas for culinary creativity.In this ultimate how-to guide, we’ll unravel the secrets to crafting flawless pizza dough from scratch, empowering you to elevate your pizza nights and impress friends and family with crust that’s as authentic as it is indeed irresistible. Ready to roll up your sleeves and embark on a dough-making adventure? Let’s get started.
Mastering homemade pizza dough begins with understanding the subtle science behind each ingredient and technique – from flour selection to fermentation. The right flour unlocks that perfect chew and crispness, while yeast activation and kneading craft the dough’s structure, ensuring every bite delights with both flavor and texture. Let’s dive into these essential steps that transform simple ingredients into a canvas for your favorite pizza creations.
Prep and Cook Time
- Preparation: 20 minutes
- Rising: 1 to 2 hours (depending on fermentation method)
- Baking: 10-15 minutes
- total Time: Approximately 2 hours 30 minutes
Yield
- Makes 2 medium-sized 12-inch pizzas (serves 3-4)
Difficulty Level
- Medium – perfect for home cooks ready to take their pizza game to the next level
Ingredients
- 3 ½ cups all-purpose flour, sifted for fine texture
- 1 cup warm water (105°F-110°F), ideal for yeast activation
- 2 ¼ teaspoons active dry yeast (one packet)
- 2 tablespoons olive oil, for elasticity and flavor
- 1 ½ teaspoons fine sea salt
- 1 teaspoon sugar, to jump-start yeast fermentation
Instructions
- Activate the yeast: In a small bowl, combine warm water, sugar, and yeast. Gently stir and let rest for 5-10 minutes untill foamy. This signals the yeast is alive and kicking, vital for perfect dough rising.
- Mix dry ingredients: In a large bowl,whisk together the flour and sea salt to evenly distribute salt and avoid yeast inhibition.
- Combine wet and dry: Pour the yeast mixture and olive oil into the flour bowl. Using a wooden spoon or your hands, mix until a rough dough forms.
- Knead to develop gluten: Turn dough onto a lightly floured surface and knead vigorously for 8-10 minutes. The dough should become smooth, elastic, and slightly tacky but not sticky. Proper kneading creates that chewy pizza bite.
- First rise: Lightly oil a large bowl and place the dough inside. Cover tightly with a damp cloth or plastic wrap and set in a warm, draft-free spot. Allow the dough to rise for 1 to 1 ½ hours, doubling in size-a sign of well-activated yeast and fermentation.
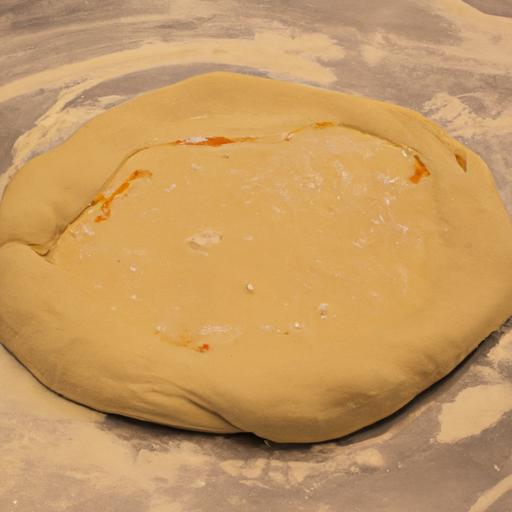
- Degas and shape: gently punch down the dough to release excess gas. Divide into two balls, cover, and allow a short 15-minute rest for relaxation, improving stretchability.
- Final shaping: Stretch or roll each ball into a 12-inch circle. Avoid pressing too hard to maintain air pockets for a light, airy crust.
- Pre-bake and add toppings: For an extra-crispy base, pre-bake each crust at 450°F (232°C) for 5 minutes before adding your favorite toppings.
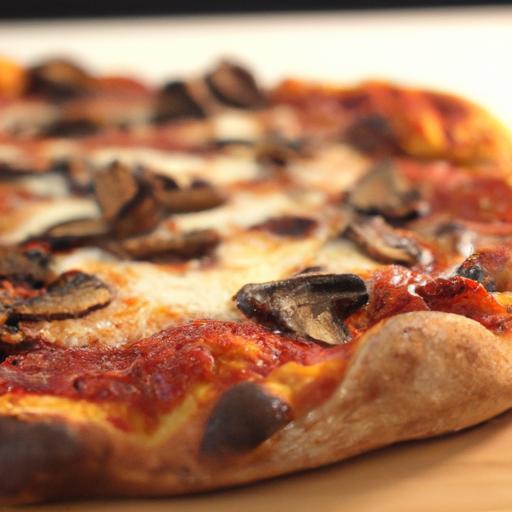
- bake pizza: Bake fully assembled pizzas at 475°F (246°C) on a pizza stone or baking sheet for 10-15 minutes, until golden-brown edges and bubbling cheese.
Chef’s Notes
- Flour selection: for a more authentic Neapolitan-style texture, substitute half the all-purpose flour with Tipo 00 flour.It yields a silky, tender crumb with a slightly crisp crust.
- Yeast tips: Always check expiration dates on yeast packets. If your yeast fails to foam during activation, start fresh-dough rising depends on this vital step.
- Kneading shortcuts: Use a stand mixer fitted with a dough hook for 6 minutes on low speed to save time without sacrificing dough advancement.
- Cold fermentation: For deeper flavor, refrigerate dough overnight (up to 24 hours) after the first rise-just bring it to room temperature before shaping.
Serving Suggestions
- Brush crust edges with garlic-infused olive oil post-bake for an irresistible aroma and shine.
- Garnish fresh pizzas with hand-torn basil, a drizzle of balsamic glaze, or a sprinkle of crushed red pepper flakes to elevate every bite.
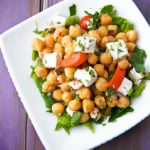
- Serve alongside a crisp arugula salad dressed in lemon vinaigrette for a refreshing counterbalance.

| Nutrient | Per Serving (per medium pizza) |
|---|---|
| Calories | 280 |
| Protein | 8 g |
| Carbohydrates | 55 g |
| Fat | 5 g |
For a deep dive into yeast science, visit the King Arthur Baking Guide. And don’t miss our detailed tutorial on homemade pizza sauce to complete your craft pizza experience!
Q&A
Q&A: Mastering Homemade Pizza Dough – Your Ultimate How-To Guide
Q1: Why should I make pizza dough from scratch rather of buying pre-made dough?
A: Making pizza dough from scratch gives you full control over the ingredients, texture, and flavor-no preservatives or hidden additives. Plus, it’s a rewarding kitchen adventure that transforms simple ingredients into a bubbling, golden canvas for all your favorite toppings. Homemade dough also lets you customize thickness and chewiness exactly how you like it.
Q2: What are the essential ingredients for pizza dough?
A: At its core, pizza dough needs just four things: flour, water, yeast, and salt. Flour provides structure, water hydrates the dough, yeast creates the airy bubbles, and salt balances flavor. Bonus ingredients like olive oil or sugar can enhance the texture and taste, but the magic lies within these basics.Q3: How critically important is the type of flour? Can I use all-purpose flour?
A: Flour choice is crucial! While all-purpose flour works well and is convenient, bread flour-higher in protein-yields a chewier, more elastic crust, frequently enough sought after in artisanal pizzas. Experimenting with different flours like Tipo ’00’ (Italian-style) can elevate your dough to pizzeria quality.
Q4: How do I know when the dough has risen enough?
A: The dough should roughly double in size. A good test is the “poke test”: gently press a finger into the dough-if the indentation springs back slowly and not completely, it’s ready. Remember, rising times can vary with room temperature; patience is key.
Q5: Can I prepare pizza dough ahead of time?
A: absolutely! Pizza dough loves a slow ferment. Refrigerate your dough for 24-72 hours to develop complex flavors and improve texture. Just bring it back to room temperature before shaping and baking.
Q6: What’s the secret to stretching the dough without tearing?
A: Let the dough rest after rolling or hand-stretching-gluten relaxes,making it more pliable. Work gently with your hands using a combination of gravity and light stretching rather than aggressive pulling. practice and patience turn the dough into a perfect, airy round.
Q7: How hot should my oven be for the best pizza results?
A: Higher is better! Home ovens max out around 500-550°F (260-290°C), which works well if you preheat a pizza stone or steel-these retain and radiate intense heat, mimicking a pizza oven’s surroundings. If you can get your oven hotter,even better!
Q8: Any tips for baking a crisp yet chewy crust?
A: Preheat your baking surface thoroughly,don’t overload with toppings (keep it balanced),and consider brushing the edges lightly with olive oil for a golden crust. Baking directly on a hot stone or steel promotes that signature crispness while preserving chewiness inside.
Q9: What common mistakes should I avoid when making pizza dough?
A: Over-kneading can make dough tough, while under-kneading prevents proper gluten development. Not giving enough time for rising leads to dense crusts. Also, skipping the preheat or baking on a cold pan often results in a soggy base. Lastly, don’t rush the process-great dough demands patience.
Q10: How can I experiment once I’ve mastered classic dough?
A: Try adding herbs, garlic powder, or even substitute some flour with whole wheat or rye for unique flavors. Play with hydration levels for thinner or thicker crusts. Once pleasant, homemade pizza dough turns into a playground of culinary creativity!
With these answers in your arsenal, you’re well on your way to mastering homemade pizza dough-creating a crust that’s as satisfying to make as it is to eat. Ready, set, stretch!
Insights and Conclusions
With your newfound mastery of homemade pizza dough, the kitchen becomes your creative canvas and every pie a masterpiece waiting to unfold. Remember, the perfect dough is a blend of patience, passion, and practice-a living ingredient that responds to your touch and tells a story with every rise and stretch. So dust off your rolling pin, embrace the tasty journey, and let your homemade pizzas become the heartwarming centerpiece of countless gatherings. After all,the best pizzas aren’t just made-they’re crafted,savored,and shared. Now, it’s time to turn your dough into unforgettable moments.Happy baking!