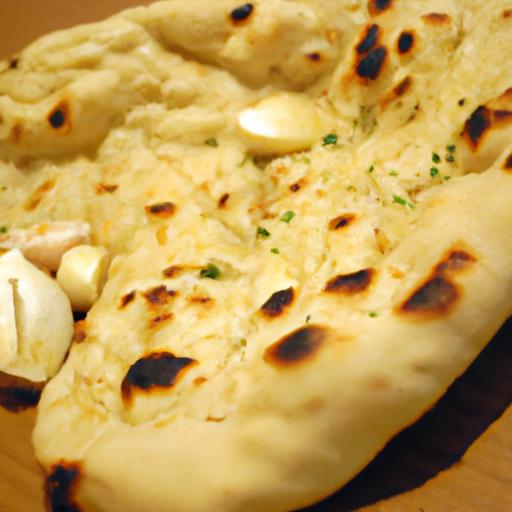
There’s something undeniably magical about tearing into a warm, pillowy piece of garlic naan-its buttery aroma swirling through the air, the subtle crunch of toasted garlic mingling with soft, fluffy bread. While this beloved Indian flatbread might once have seemed destined for restaurant menus, mastering garlic naan at home is an achievable adn deeply rewarding adventure. In this article, we’ll take you on a step-by-step journey to craft this savory delight entirely from scratch, unlocking the secrets behind its perfect texture and vibrant flavors. Whether you’re a seasoned home cook or a curious beginner, get ready to elevate your kitchen skills and bring the authentic taste of garlic naan straight to your table.
Mastering Garlic Naan: Homemade Recipe From Scratch
Mastering Garlic Naan from scratch is a culinary journey that transforms everyday ingredients into a warm, pillowy bread bursting with vibrant flavors. Rooted in Indian kitchens and clay ovens, garlic naan has captivated taste buds worldwide with its delicate crisp edges and tender crumb infused with fragrant garlic. This recipe not only honors tradition but invites you to create this beloved flatbread in your own kitchen, turning simple dough into an irresistible centerpiece for any meal.
Prep and Cook Time
- Planning time: 20 minutes
- Rising time: 1 hour 30 minutes
- Cooking time: 10-12 minutes
Yield
Makes 6 medium-sized garlic naans
Difficulty Level
Medium – perfect for those ready to elevate their bread-making skills
Ingredients
- 2 cups all-purpose flour, sifted
- 1 tsp instant yeast
- 1 tsp sugar
- ½ tsp salt
- ¾ cup warm whole milk (about 110°F/43°C)
- 2 tbsp plain yogurt, whisked
- 2 tbsp melted ghee or unsalted butter
- 3 large cloves garlic, finely minced
- fresh cilantro, chopped (for garnish)
- Additional melted ghee, for brushing
Instructions
- Activate the yeast: In a small bowl, combine warm milk, sugar, and instant yeast.Stir gently and let rest until foamy, about 8-10 minutes.This confirms your yeast is alive and ready.
- Prepare the dough: In a large mixing bowl,sift together the flour and salt.Add whisked yogurt, melted ghee, and the activated yeast mixture. Stir with a wooden spoon until a sticky dough forms.
- Knead the dough: Transfer dough to a lightly floured surface. Knead vigorously for 8-10 minutes until smooth and elastic. Hint: The dough should be soft but not overly sticky; dust with flour little by little to avoid dryness.
- First rise: Form the dough into a ball and place in an oiled bowl. Cover tightly with a clean damp towel or plastic wrap. Let it rise in a warm spot for 1 hour or until doubled in size.
- Prepare garlic butter: Mix finely minced garlic with 2 tablespoons melted ghee. Set aside to infuse the flavors.
- Divide and shape: Punch down the risen dough gently. Divide into 6 equal portions and roll each into a smooth ball. Cover to prevent drying.
- Roll out the naan: Lightly flour your work surface. Using a rolling pin, roll each ball into an oval or teardrop shape about ¼ inch thick. Scatter a pinch of minced garlic on top and press gently to adhere.Avoid pressing too deep to keep garlic flavor balanced.
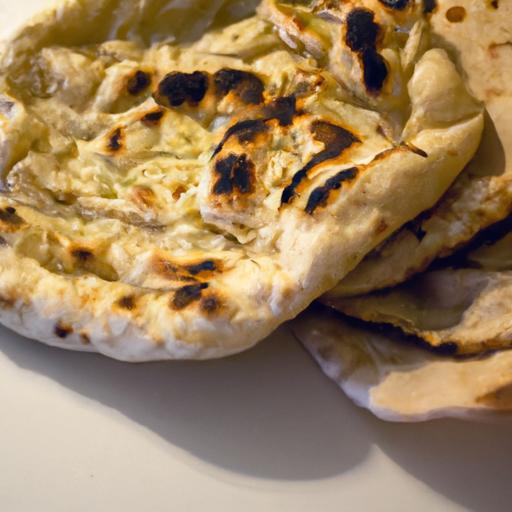
- Cook on a hot skillet: Heat a cast-iron or non-stick pan over medium-high heat until vrey hot. Place one naan on the skillet. Cook until bubbles appear on the surface, about 1-2 minutes. Flip and cook the other side for 1-2 minutes until golden spots appear.
- Brush with garlic ghee: Immediately brush cooked naan with your garlic-infused melted ghee. Garnish with freshly chopped cilantro.
- repeat: Cook remaining naans, stacking them wrapped in a kitchen towel to keep warm and soft.
Tips for Success: Elevate Your Garlic Naan Experience
- Yeast activation: Always test yeast with warm milk slightly warmer than body temperature to ensure maximum rise. If the mixture doesn’t foam, your yeast might be inactive.
- Dough hydration: The dough should be tacky but manageable. If it feels too sticky, add a sprinkle of flour, or if too dry, splash a tablespoon of milk. This balance creates soft, airy bread.
- Rolling technique: Roll gently but firmly to maintain even thickness. Overworking flattens the dough and reduces fluffiness after cooking.
- Cooking surface: A cast-iron skillet is best for authentic char and heat retention. Avoid excessive oil to keep naan light.
- Make ahead: Dough can be refrigerated overnight; just bring back to room temperature before rolling out. This enhances flavor complexity.
- Flavor variations: Infuse melted butter with crushed black pepper, finely chopped mint, or nigella seeds for creative twists.
Serving Suggestions
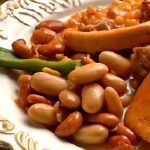
Garlic naan shines as a companion to rich Indian dishes like butter chicken, dal makhani, or spicy kebabs. Serve warm, tearable pieces alongside a cooling raita or fresh cucumber salad. For a festive touch, sprinkle lightly toasted sesame seeds on top before cooking. A side of tangy mango chutney or fresh lemon wedges adds brightness, and a dusting of smoked paprika over the garlic butter elevates the presentation beautifully. A steaming cup of masala chai makes the perfect partner for a cozy naan snack.

| nutrient | Per Serving (1 naan) |
|---|---|
| Calories | 210 kcal |
| Protein | 6 g |
| Carbohydrates | 34 g |
| Fat | 5 g |
For a deeper dive into Indian breads, explore our guide on Homemade Indian Bread Recipes. For more on yeast science and bread rising, check the expert insights at King Arthur Baking’s Bread Science Guide.
Q&A
Q&A: Mastering Garlic Naan – Homemade Recipe From Scratch
Q1: What makes garlic naan so irresistible compared to regular bread?
A1: Garlic naan is more than just bread-it’s a fluffy, pillowy vessel infused with aromatic garlic and charred to perfection in a tandoor or skillet. The combination of warm, buttery dough and the zing of fresh garlic creates a mouthwatering experience that elevates any meal.
Q2: Can I make garlic naan at home without a tandoor oven?
A2: Absolutely! While conventional naan bakes in a blazing tandoor, you can replicate that perfect char and fluffiness on a hot cast-iron skillet or heavy-bottomed pan. The key is high heat and rapid cooking,which gives naan its signature air pockets and slight charred spots.
Q3: What’s the secret ingredient in garlic naan dough?
A3: The magic lies in the yogurt and yeast combo. Yogurt tenderizes the dough, lending it a subtle tang and soft texture, while yeast ensures that lovely rise and airy fluff. Together, they create a dough that’s elastic, soft, and ready to soak up all the garlicky goodness.
Q4: How do I get the garlic flavor just right-not too overpowering but perfectly aromatic?
A4: Freshly minced garlic gently sautéed in butter or ghee makes all the difference.Spread the warm garlic butter on the naan right after cooking so it melts in beautifully without biting you in the back of the throat. A sprinkle of finely chopped cilantro adds a fresh note, balancing the flavors.
Q5: What tips will help my naan be soft yet slightly crispy on the outside?
A5: Rolling your dough evenly but not too thin is essential-aim for about ¼ inch thickness.Preheat your skillet to high heat before cooking, and cook each side just until bubbly and lightly charred spots appear. Covering the naan with a clean cloth once cooked traps steam, keeping it soft inside.
Q6: Can I customize the garlic naan to suit different tastes?
A6: Definitely! Aside from traditional garlic, try infusing your naan with herbs like rosemary or adding a sprinkle of nigella seeds for an exotic twist. For cheesy garlic naan, fold in shredded mozzarella or paneer before cooking. The possibilities are deliciously endless.
Q7: How long can I store homemade garlic naan, and how do I reheat it?
A7: Fresh garlic naan is best enjoyed the same day, but you can store leftovers wrapped tightly in foil or ziplock bags in the fridge for 2-3 days. To reheat, warm it up on a skillet or in the oven wrapped in foil; avoid microwaving as it tends to make the bread rubbery.
Q8: Is garlic naan gluten-free kind?
A8: Traditional naan relies on wheat flour for its chewy texture, so it’s not naturally gluten-free.However, adventurous cooks can experiment with gluten-free flours mixed with xanthan gum or other binding agents, but the texture and rise may differ from classic naan.
Q9: What dishes pair best with homemade garlic naan?
A9: Garlic naan shines as the perfect companion to rich curries like butter chicken,palak paneer,or chana masala. It’s also fantastic wrapped around spiced kebabs or used as a base for naan pizzas. Its garlicky warmth lifts any dish into a feast.
Q10: Any final pro tips for mastering garlic naan at home?
A10: Patience and loving hands are your best tools. Let your dough ferment long enough for optimal rise and flavor. Don’t rush the cooking; high heat and attentive flipping are key.And moast importantly-brush with garlic butter generously and enjoy every bite warm straight from the pan!
To Conclude
As the warm aroma of freshly baked garlic naan fills your kitchen, you’ll realize that mastering this beloved staple is more than just a recipe-it’s an invitation to infuse your cooking with tradition, flavor, and a touch of homemade magic. With a few simple ingredients and a bit of practise, you can transform everyday meals into memorable feasts that celebrate the art of bread-making from scratch. So next time you crave that perfect blend of soft, pillowy naan kissed with garlicky goodness, you’ll have the confidence and know-how to create it yourself-turning your kitchen into a fragrant haven where every bite tells a story. happy baking!