There’s something undeniably magical about biting into a warm, fluffy greek pita-a perfect balance of soft texture and subtle flavor that transports you straight to sun-drenched Mediterranean kitchens. But while this humble bread might seem simple,mastering the art of Greek pita from scratch is a culinary journey worth embarking on. In this step-by-step guide, we’ll unravel the secrets behind creating authentic, pillowy pitas that puff up just right and serve as the perfect canvas for your favorite fillings. Whether you’re a seasoned baker or a curious beginner, get ready to roll up your sleeves and bring a little piece of greece into your home kitchen.
Mastering Greek Pita is not just about mixing flour and water-it’s about honoring centuries of tradition while coaxing life into dough with every fold and turn. This iconic bread, soft yet perfectly pocketed, carries the spirit of Greek kitchens and Mediterranean gatherings.My earliest memories involve warm pitas handed around sun-soaked tables, their tender fluffiness inviting endless fillings. Here, you’ll uncover the art behind choosing authentic ingredients, embracing tactile mixing and kneading, and the subtle secrets that yield the perfect pocket and texture. Let’s embark on this flavorful journey that transforms humble dough into a centerpiece worthy of any feast.
Prep and Cook Time
- Readiness: 15 minutes
- Rising: 1 hour 30 minutes
- Baking: 10-12 minutes
- Total Time: Approximately 1 hour 55 minutes
Yield
Makes 8-10 soft Greek pitas
Difficulty Level
Medium – Requires moderate kneading and attention to dough texture.
Ingredients
- 3 cups all-purpose flour, sifted (plus extra for dusting)
- 1 cup warm water (about 110°F/43°C)
- 2 tsp active dry yeast
- 1 tsp granulated sugar
- 2 tbsp extra virgin olive oil
- 1 tsp fine sea salt
- Optional: 1 tbsp plain yogurt for a subtle tang and extra softness
Instructions
- Activate the yeast: in a small bowl, combine warm water, sugar, and yeast. Let it bloom for 8-10 minutes until foamy and bubbly-this signals a healthy yeast culture ready to lift your dough.
- Mix the dough: In a large mixing bowl, whisk together the flour and salt. Make a well in the center,then pour in the activated yeast mixture and olive oil (plus yogurt if using). Using a wooden spoon or your hand, incorporate ingredients until a shaggy dough forms.
- Knead the dough: Transfer dough onto a lightly floured surface. Knead with the heels of your hands for 8-10 minutes, pushing, folding, and turning. A well-kneaded Greek pita dough feels elastic yet soft-not sticky. If too sticky, sprinkle extra flour sparingly to avoid stiffness.
- first rise: Shape dough into a smooth ball, lightly oil a clean bowl, and place the dough inside. Cover with a damp cloth or plastic wrap. Let rise in a warm draft-free spot for 1 to 1.5 hours, until doubled in size.
- Divide and shape: Gently deflate the risen dough and turn it onto a floured surface. Divide into 8-10 equal portions. Roll each portion into a ball, then use a rolling pin to create thin rounds approximately 6-7 inches in diameter. Aim for even thickness-too thick prevents proper pocket formation, too thin tears easily.
- Rest before baking: Allow rolled rounds to rest for 10 minutes under a cloth so gluten relaxes, which helps them puff beautifully in the oven.
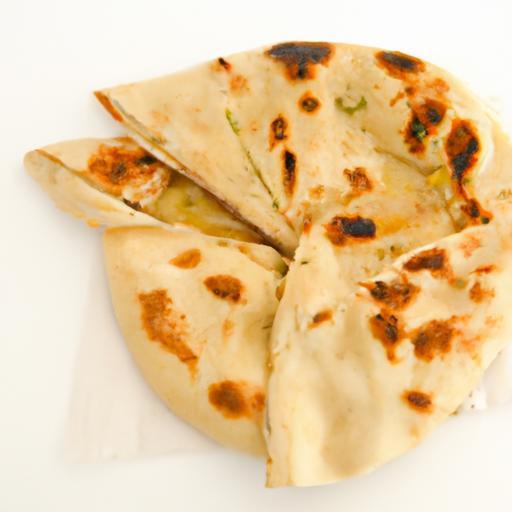
- Bake: Preheat oven to 475°F (245°C) with a baking stone or heavy baking tray inside to emulate authentic high heat. Place pita rounds on the hot surface in batches, baking 3-4 minutes until puffed and lightly golden. you’ll see pockets form as steam inflates each pita from within.
- Cool and store: Transfer baked pitas to a clean kitchen towel and cover promptly; this traps moisture and keeps them soft. serve warm or cool entirely before storing in an airtight container.
Tips for Success
- Flour choice: For authenticity, use unbleached all-purpose flour or bread flour with moderate protein content to develop gluten structure essential for flaunting hearty pockets.
- Water temperature: Yeast activation hinges on warm water-too hot kills the yeast, too cold slows fermentation. Aim for 110°F/43°C.
- Kneading clues: Dough should become smooth, elastic, and springy. If it tears easily during shaping, knead a few minutes more or rest to relax gluten strands.
- High heat baking: A piping-hot baking stone simulates traditional taboon ovens, triggering rapid steam pockets. Don’t skimp on preheating for perfect puffing.
- Make ahead: Dough can be refrigerated after the first rise, covered tightly, for up to 24 hours. Bring to room temperature before shaping and baking.
- Variations: Add herbs like dried oregano or za’atar into the dough for an aromatic twist.
Serving Suggestions
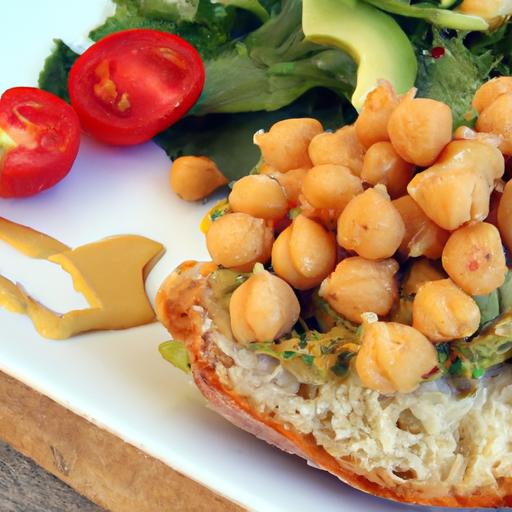
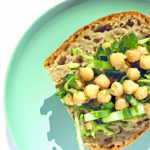
Greek pita is a versatile canvas for vibrant flavors. Warm pockets filled with creamy tzatziki, juicy grilled souvlaki, fresh tomatoes, cucumbers, and feta cheese create iconic wraps brimming with Mediterranean sunshine.Garnish with a sprinkle of fresh dill or parsley and a drizzle of extra virgin olive oil. Use pita to scoop up hearty dips like hummus or baba ghanoush at your next gathering, or transform them into pita chips by brushing with olive oil and baking until crisp.

| nutrient | Per Pita (approx.) |
|---|---|
| Calories | 160 kcal |
| Protein | 5 g |
| Carbohydrates | 30 g |
| Fat | 3 g |
for more Mediterranean bread baking inspiration, check out our complete guide on Mediterranean Breads. To deepen your knowledge about yeast fermentation science, visit the King Arthur Baking educational guide.
Q&A
Q&A: Mastering Greek Pita – A Step-by-Step Guide from Scratch
Q1: What makes Greek pita different from other types of flatbread?
A1: Greek pita is a soft, slightly chewy flatbread that’s frequently enough pocketed, making it perfect for stuffing with gyro meat, veggies, and tzatziki. Unlike some other flatbreads that can be crisp or cracker-like, Greek pita boasts a pillowy texture and subtle, tangy flavor thanks to its simple but well-balanced ingredients.
Q2: Do I need special ingredients to make authentic Greek pita?
A2: Not at all! The magic of Greek pita lies in its simplicity. Basic pantry staples like all-purpose flour, water, yeast, olive oil, salt, and a pinch of sugar are all you need. The key is in the technique and letting the dough rest properly for that signature softness.
Q3: How long does it take to make pita from scratch?
A3: From start to finish, expect about 2 to 3 hours. Most of this time is inactive, as the dough needs to rise. The actual hands-on time-mixing, kneading, rolling, and cooking-is surprisingly short, typically under an hour.
Q4: What’s the secret to getting those perfect pita pockets?
A4: The pocket forms thanks to high heat and steam. Rolling the dough balls evenly and cooking them quickly on a hot surface causes the moisture to puff up inside, creating a hollow center. Avoid over-rolling or using a low heat; both can prevent the pita from puffing up properly.
Q5: Can I make pita without yeast?
A5: Traditional Greek pita relies on yeast for that soft, airy texture and subtle flavor. You can try speedy flatbreads without yeast, but they won’t have the same pocket or chewiness. For authentic pita, yeast is your best friend.
Q6: How do I store leftover pita bread?
A6: Let your pita cool completely, then store it in an airtight container or zipper bag at room temperature for up to 2 days. For longer storage, freeze them wrapped in foil or plastic wrap-reheat in a skillet or oven to bring back softness before serving.
Q7: Can I use whole wheat flour rather of white flour?
A7: Yes! Whole wheat pita is a healthier option and adds a nutty flavor. Keep in mind it may be slightly denser, so you might want to use a blend of whole wheat and all-purpose flour to keep that soft texture while boosting nutrition.
Q8: How can I customize my pita?
A8: Once you’ve mastered the basic dough, let creativity be your guide. Add herbs like oregano or rosemary to the dough for an aromatic twist, brush with garlic-infused olive oil before cooking, or sprinkle sesame seeds or nigella seeds on top for that classic visual and flavor boost.
Q9: Is Greek pita hard to make for beginners?
A9: Not at all! While it may seem intimidating, Greek pita is surprisingly forgiving.With a little practice in kneading and heat management, even novice bakers can achieve puffy, tender pita. This guide breaks down each step clearly, turning any kitchen into a Greek bakery.
Q10: What dishes pair best with homemade Greek pita?
A10: The possibilities are endless! Use pita as the base for gyros or souvlaki, serve alongside hummus and baba ganoush, wrap up falafel or grilled veggies, or simply enjoy warm pita with a drizzle of olive oil and a sprinkle of sea salt for a delightful snack.
Ready to embark on your pita-making adventure? Follow these steps, stay patient, and soon you’ll be mastering Greek pita like a true Athenian artisan!
Closing Remarks
with each fold of dough and every warm, golden pita pulled fresh from the pan, you’ve not only created a staple of Greek cuisine-you’ve embraced a tradition that’s been savored for centuries. Mastering Greek pita from scratch is more than just a culinary achievement; it’s an invitation to share in the rich tapestry of flavors and stories that define Mediterranean culture.So, whether you’re stuffing your pita with savory souvlaki, creamy tzatziki, or simply savoring it warm and fresh, remember that the journey from humble ingredients to perfect pocket is a delicious testament to patience and passion. Keep experimenting, keep baking, and let each pita you make be a little piece of Greece right in your own kitchen. Opa!